I’ve been so excited to write this post, but I’ve also put it off for a long time because I didn’t know where to start! When I first started offering yearbook design, it became obvious pretty quickly that most people didn’t have a good handle on digital photo storage. Collecting photos was usually the longest part of the process, because my clients had to go digging on multiple devices/cloud services to gather all their photos from just one year. I don’t blame them! If I didn’t have to have a system for my job, I probably wouldn’t know what to do either. But when you’re importing 1000+ images a week for clients, you have to make some structure, so I just started keeping our personal photos the same way! This structure makes it so that if I had to give someone all of my 2018 photos, I could literally do so with one drag and drop.
Now, my big disclaimer on this post is that I’m not going to tell you that everyone needs to organize their photos like me. I haven’t done extensive research on the very best, most efficient, least-amount-of-upkeep system, and I recognize that everyone’s situation is a little bit different. Some people only use their phones to take pictures, and some people have phones, cameras, and iPads. Some people edit their photos and keep RAW files, some don’t. The list goes on! So I’m only going to explain what our family does, with a few caveats for how you might be able to customize our system to fit your needs, and you can pick and choose the systems you want to incorporate for yourself. Having your photos organized is just like anything else – it makes it easier for you to actually use what you have because you can find what you need.

There are two important components to this discussion:
First, how you organize your photos so that you know where the photo you have in mind lives. If I need to pull a photo for a birthday card, or I want to order some prints for our walls, I want to be able to quickly locate my photos.
Second, how you back up and store your photos long-term. Talking about this gives me so much anxiety because I know that so many people only have their photos stored in one place! I’ve heard so many sad stories about someone’s phone breaking and them losing the first six months of their baby’s photos forever. No photos should ever be stored just on your phone or just on your laptop. You need at least two copies of every digital photo you care about! One summer, I was working on a client’s wedding, and my external hard drive just stopped working. Refused to connect, and then when it did connect, showed me that I had no photos on my drive. I WAS FREAKED OUT. But I knew that I had a copy of all my files elsewhere, so while it was extremely tedious to retrieve them (it was multiple thousands of photos), nothing was lost.

Before I get into it, I need to explain the “software” I’m using to organize our photos. Software is in quotations, because you don’t actually need anything beyond your computer’s basic operating system to replicate my organizational system! Even though I’ve been a Mac user for over 10 years, I no longer store any photos on iPhoto, because I figured out that doing so causes two problems: first, iPhoto stores a billion little copies of your photos deep in the recesses of your computer every time you edit them. This eats up space over time, and while it’s possible to keep deleting the copies, you’ll have to keep doing this over and over again (and the copies are not easy to find). Second, once imported, every time you need a photo, you’ll have to export a copy from iPhoto. All of your files go into a complicated storage structure with folders and file names that are jibberish, so nothing can be easily transferred. When my yearbook client had to get a year’s worth of photos to me, she couldn’t drag and drop a folder to our transfer website; she had to keep her laptop open and monopolized for three days to export all of her photos.
So like I said, we use our computers’ regular file browser to store photos. For my Mac, that’s Finder; for Kealan’s ThinkPad, it’s Windows Explorer.

Here’s the basic breakdown of what happens when a photo is taken on my camera.
I’ll later explain what happens with a phone photo, so that phone-only folks can follow along.
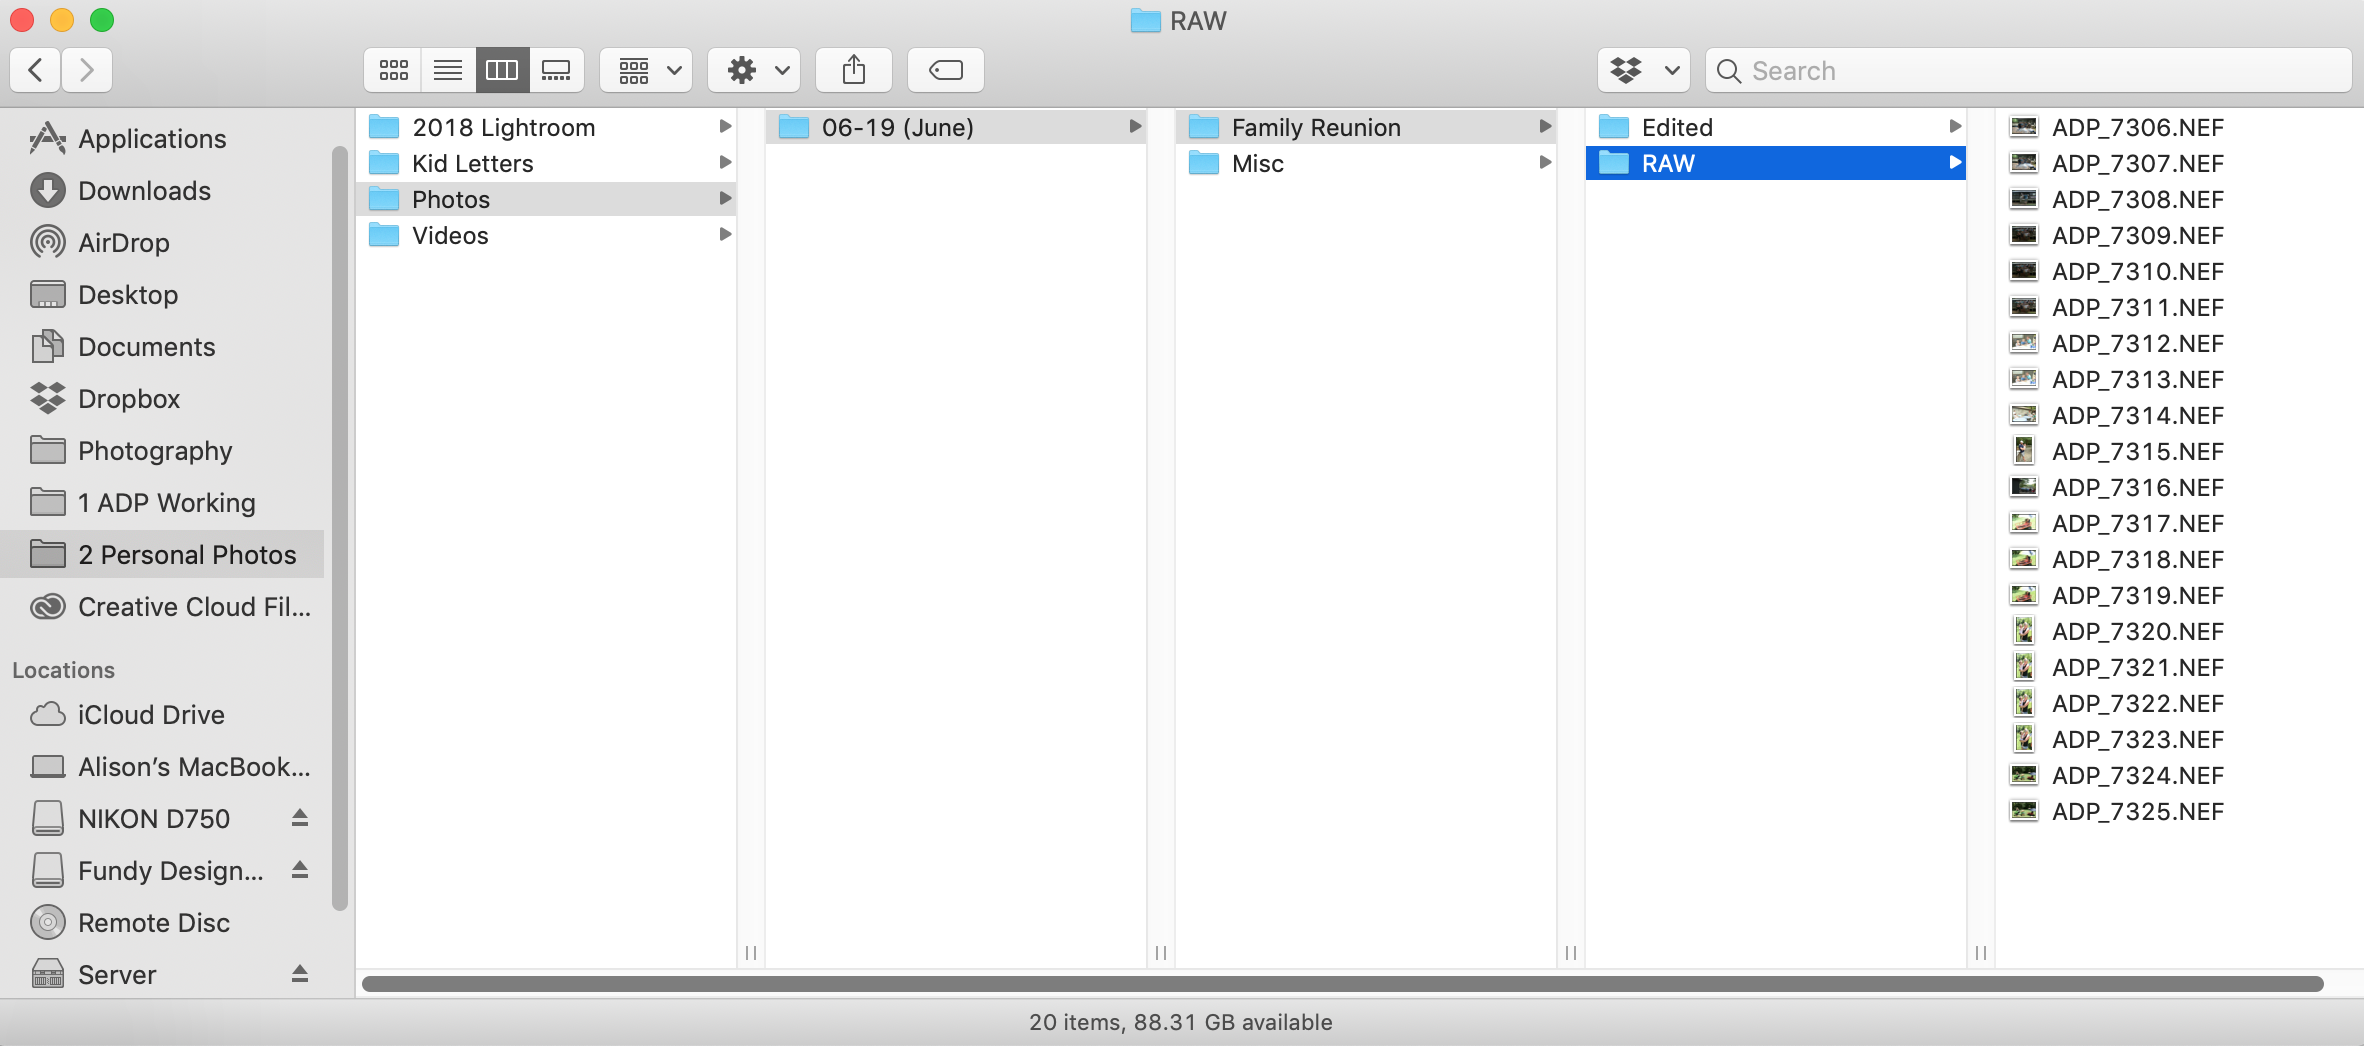
1) Our family reunion photos are imported from a memory card to my laptop, where I keep only the photos I’m currently working on for ADP clients, and personal photos from the current month. The important thing to note is that the memory card does not yet get formatted (i.e., images aren’t deleted off the card) until step 5, when there are guaranteed copies of the images in multiple places. As you can see in the image below, I use the following structure:
Master folder of personal photos (“Photos”) > Current Month (“06-19 (June)”) > Event (“Family Reunion”) > “RAW”
Whenever I have photos that aren’t specific to an event, like a one-off photo of Riley petting Colby, I put that in a “Misc.” folder for the current month. You can see that below the “Family Reunion” folder.
Bonus tip! I title the month folders with numbers first (so 06-19, rather than June) so that they won’t try to alphabetize themselves.
2) CrashPlan (a cloud backup system) automatically starts backing up my files. It prioritizes the newest / “currently working” files. This is the first backup file, and this is what saved my bacon when my hard drive corrupted. I’m basically never accessing files stored on CrashPlan because it’s not designed to be a file browsing system – you can only view file names (no image thumbnails), and it requires passwords to get your files down, etc. Tedious. BUT. It gives me great peace of mind and has been a lifesaver in emergencies/accidents.
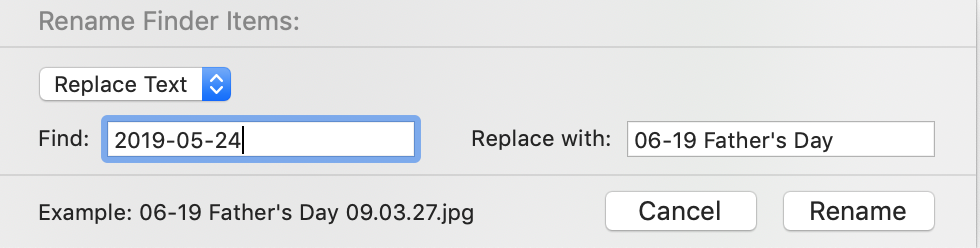
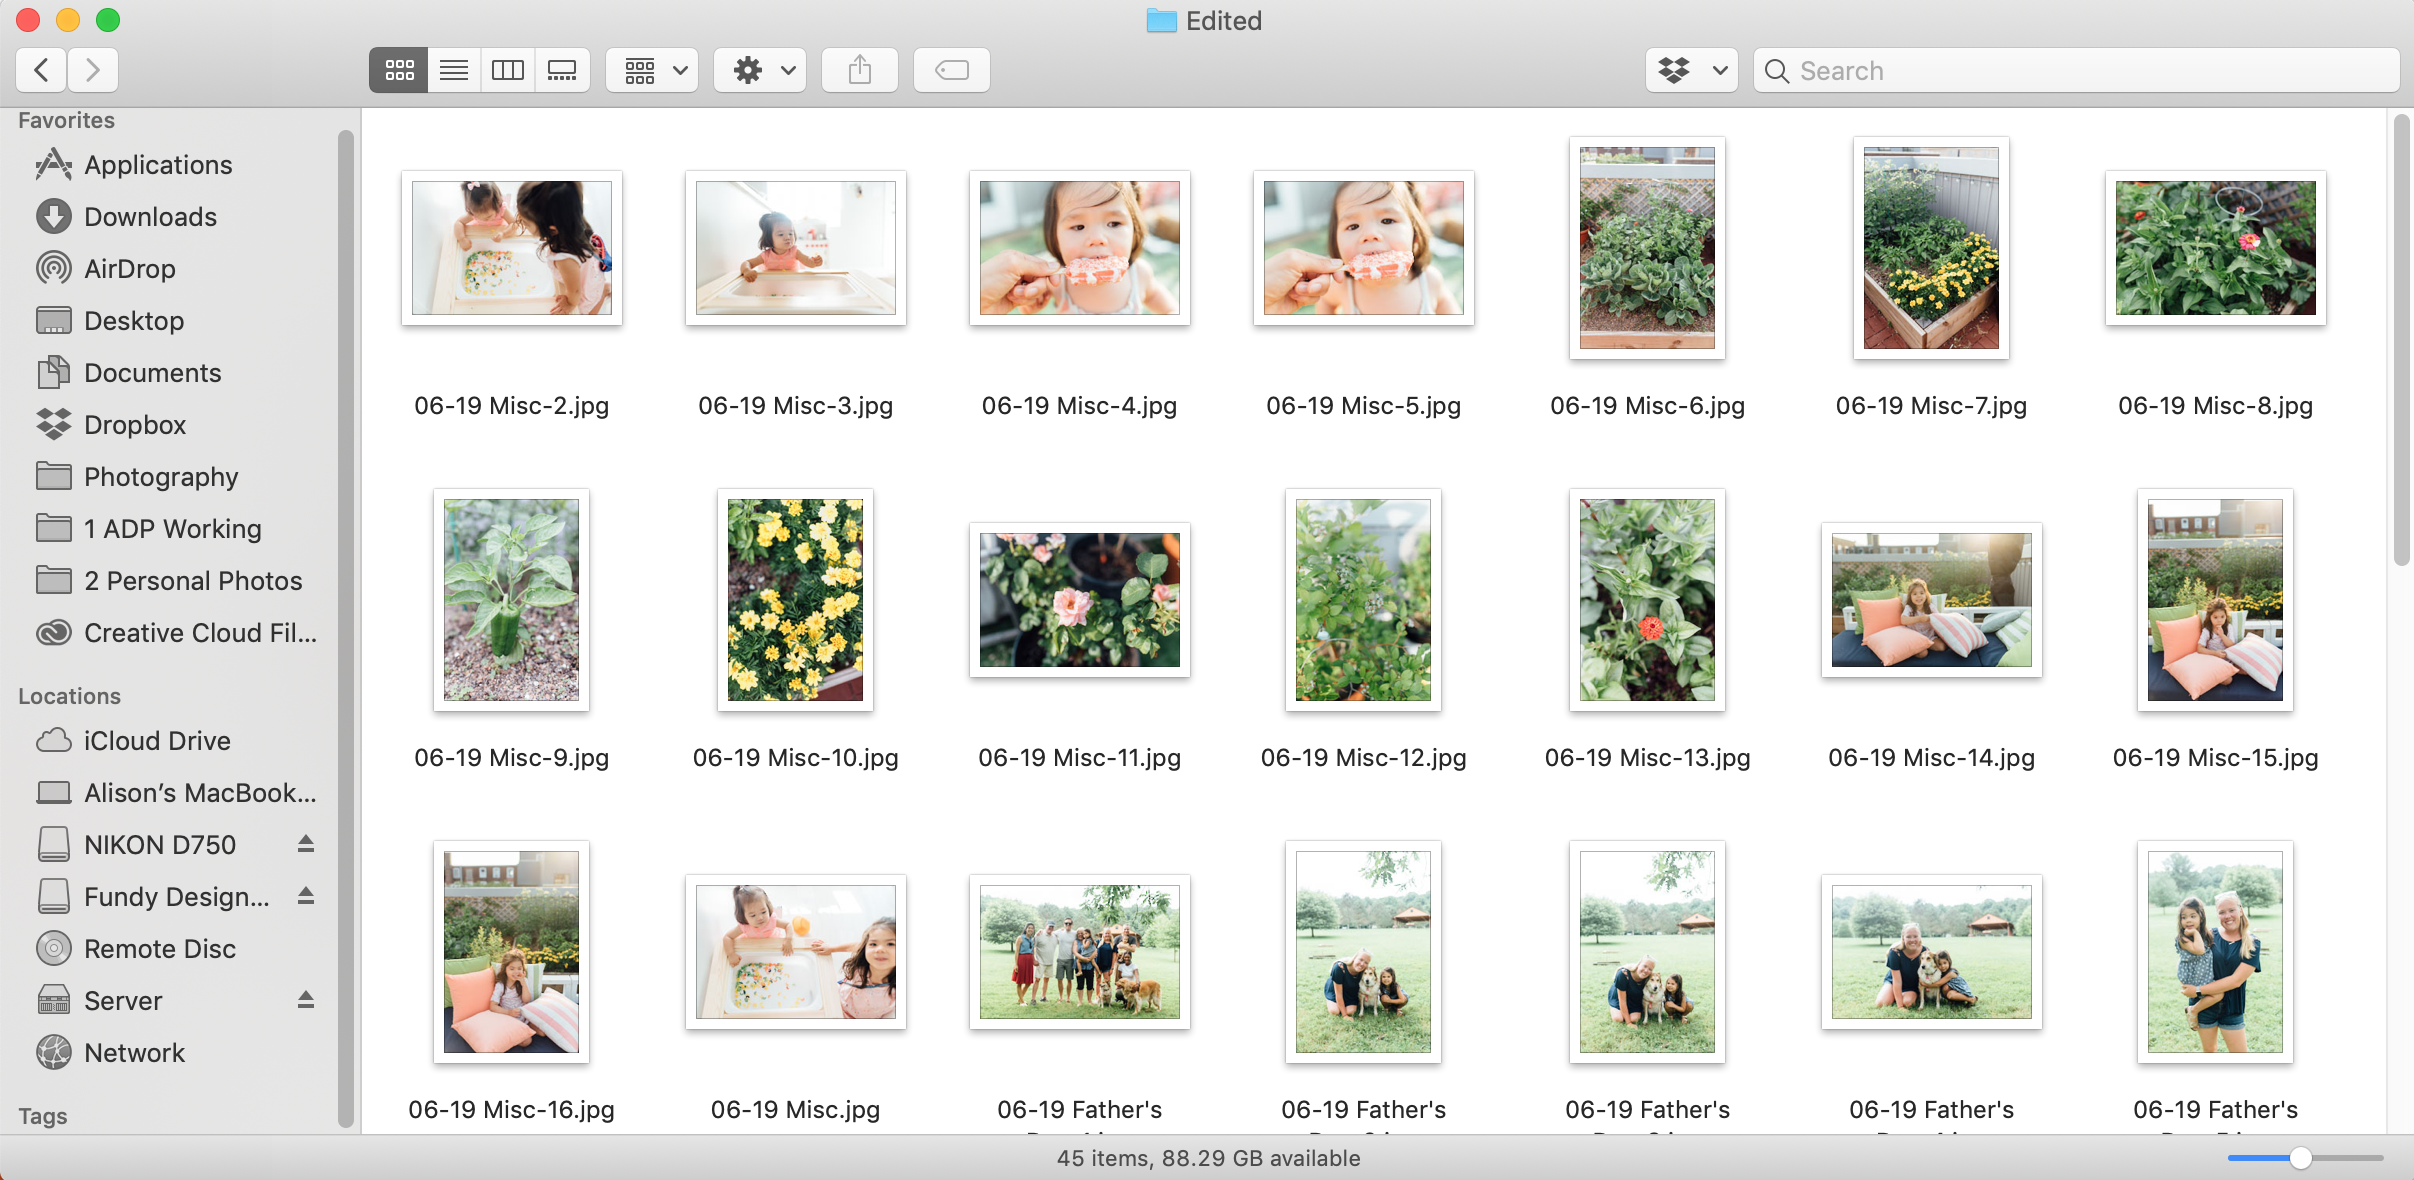
3) I edit photos in Lightroom, then export the jpg files to an “Edited” folder in the same “Family Reunion” folder, which you can see below. When exporting for a specific event, I’ll title the files “06-19 Family Reunion-1.jpg” or “06-19 Family Reunion-2.jpg” for even easier reference later. If it’s a misc. photo, I’ll just title it “06-19 Misc.jpg” so at least the month is in the file name.

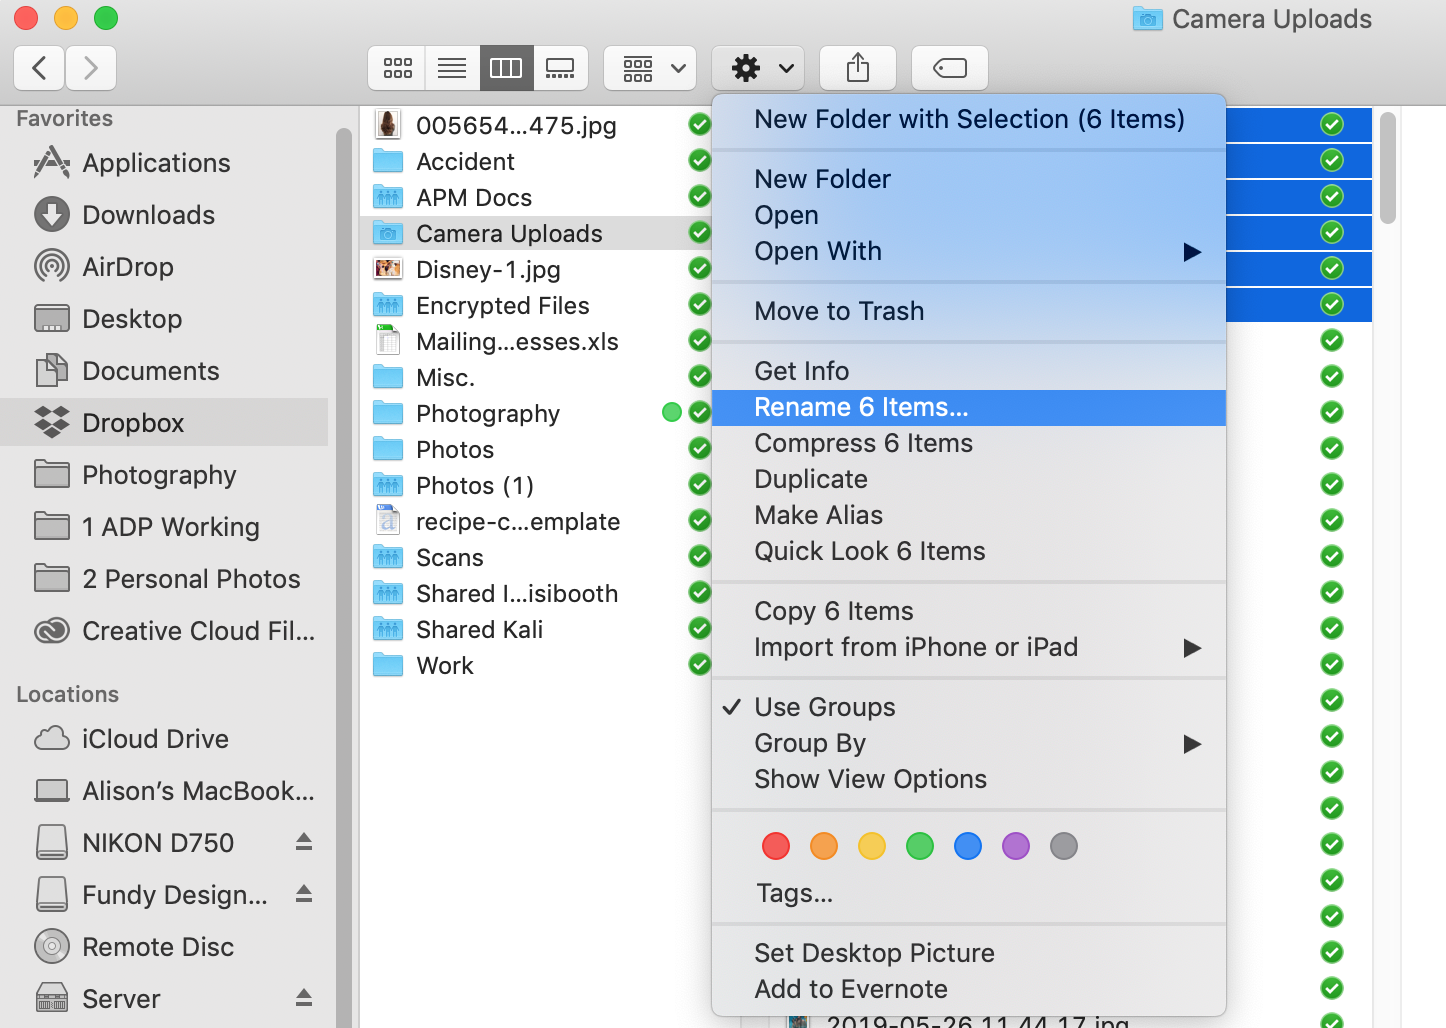
Another tip! Even if you don’t use an editing program to export files, you can still rename your photos! From Finder, highlight the photos you’re interested in renaming. Go to the little gear, then “Rename x Items…”
After editing & exporting, from my laptop, I delete any non-keepers from the “RAW” folder to save space.
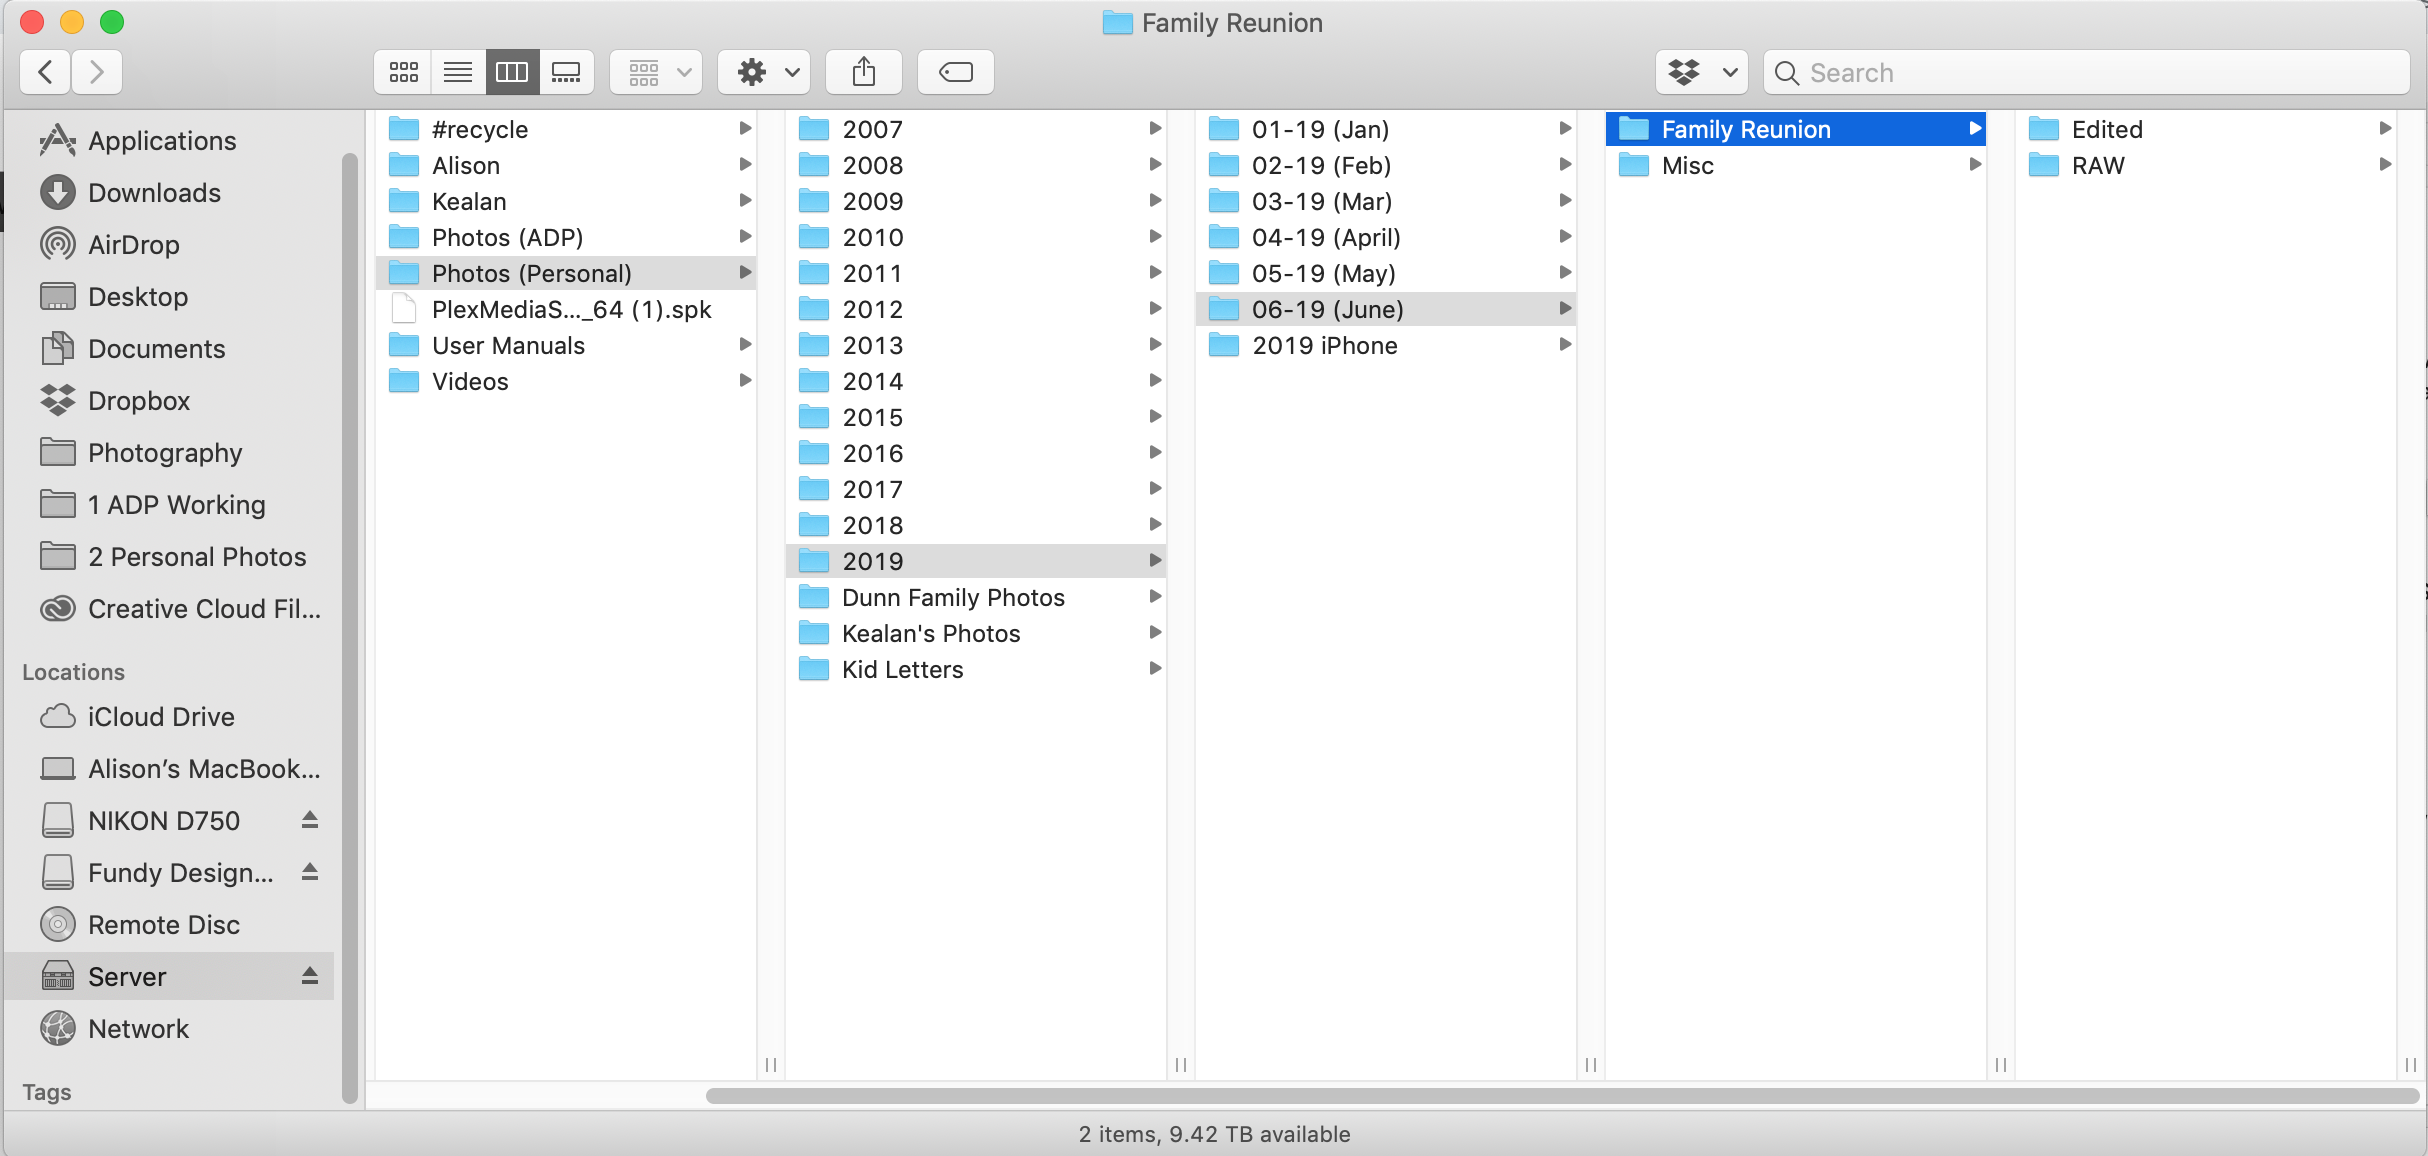
4) At the end of every month, I put the whole month folder onto our server. Most people would be using an external hard drive here instead of a server, so don’t be confused :) My server is basically a glorified bunch of external hard drives working together so that there are multiple copies there; this is just because of the nature of my work + volume of photos I go through. Since everything is already organized chronologically, the folder just gets plopped into the 2019 folder. That looks like this:
I know that iCloud also holds your photos in the cloud, which is great! The only beef I have with iCloud is that when you need to download or transfer large amounts of photos, it’s extremely cumbersome. You can either download photos one by one, or download ALL of the photos you’ve ever put onto iCloud all at once. To my knowledge, you can’t download by month, or select 20 photos to pull down all together. So while it’s great to have iCloud as a backup, just keep in mind that down the line it may be frustrating to work with. You may want to sub this in for CrashPlan in my system, since it’s automatic and a good emergency backup! But if you do any kind of work on your computer that isn’t on something like Dropbox, I’d recommend getting CrashPlan or something similar.
6) The last step, which I mentioned is totally unnecessary but a part of our system, is to upload our favorite photos to the same gallery hosting site I use for my clients’ photos! I use this just because I have the space, and it’s the prettiest to look at :) I keep just the best of the best on here and organize them a little differently because I basically use this gallery to quickly grab photos for Instagram or when I make birthday cards. I make the same few categories for every year: Addie + Riley 2019, Colby 2019, Kealan’s family 2019, Alison’s family 2019, and Friends 2019.

Once photos are in all the places, I remove them from my laptop. Onward!
Phone files:
I only take a few phone photos every day, and usually use my real camera for any sort of major event. But I love having my phone camera whenever I’m too lazy to break out the big camera or left it at home – the best camera is the one you have on you, so they say :) Because my phone photos are just a mish-mash of photos, I only do a few steps with them:
1) My phone photos automatically upload to Dropbox. You may do this with iCloud or Google Photos already! I’d highly suggest having something automatically pull your photos just in case you drop your phone in water or something :) Even if you don’t set something up (even though again, YOU SHOULD), you can set a weekly or monthly reminder to AirDrop your photos to your computer, just so you have two copies.
2) When my phone runs out of space, Dropbox starts running out of space, or when it’s the end of the year when we make our yearbook, I pull the photos from Dropbox into my file structure. I just put them into one big folder “(2019 iPhone) inside the year (“2019”) folder. I also have a “2019 Kealan Phone” folder. If I wanted to, I could organize the files into my existing folder structure, by month and event. But honestly, if you’re looking for the least work possible, just keeping your photos from all your devices organized by year would be helpful! The file name of phone photos has the date in it, so you’d be able to find what you were looking for if you sorted chronologically.
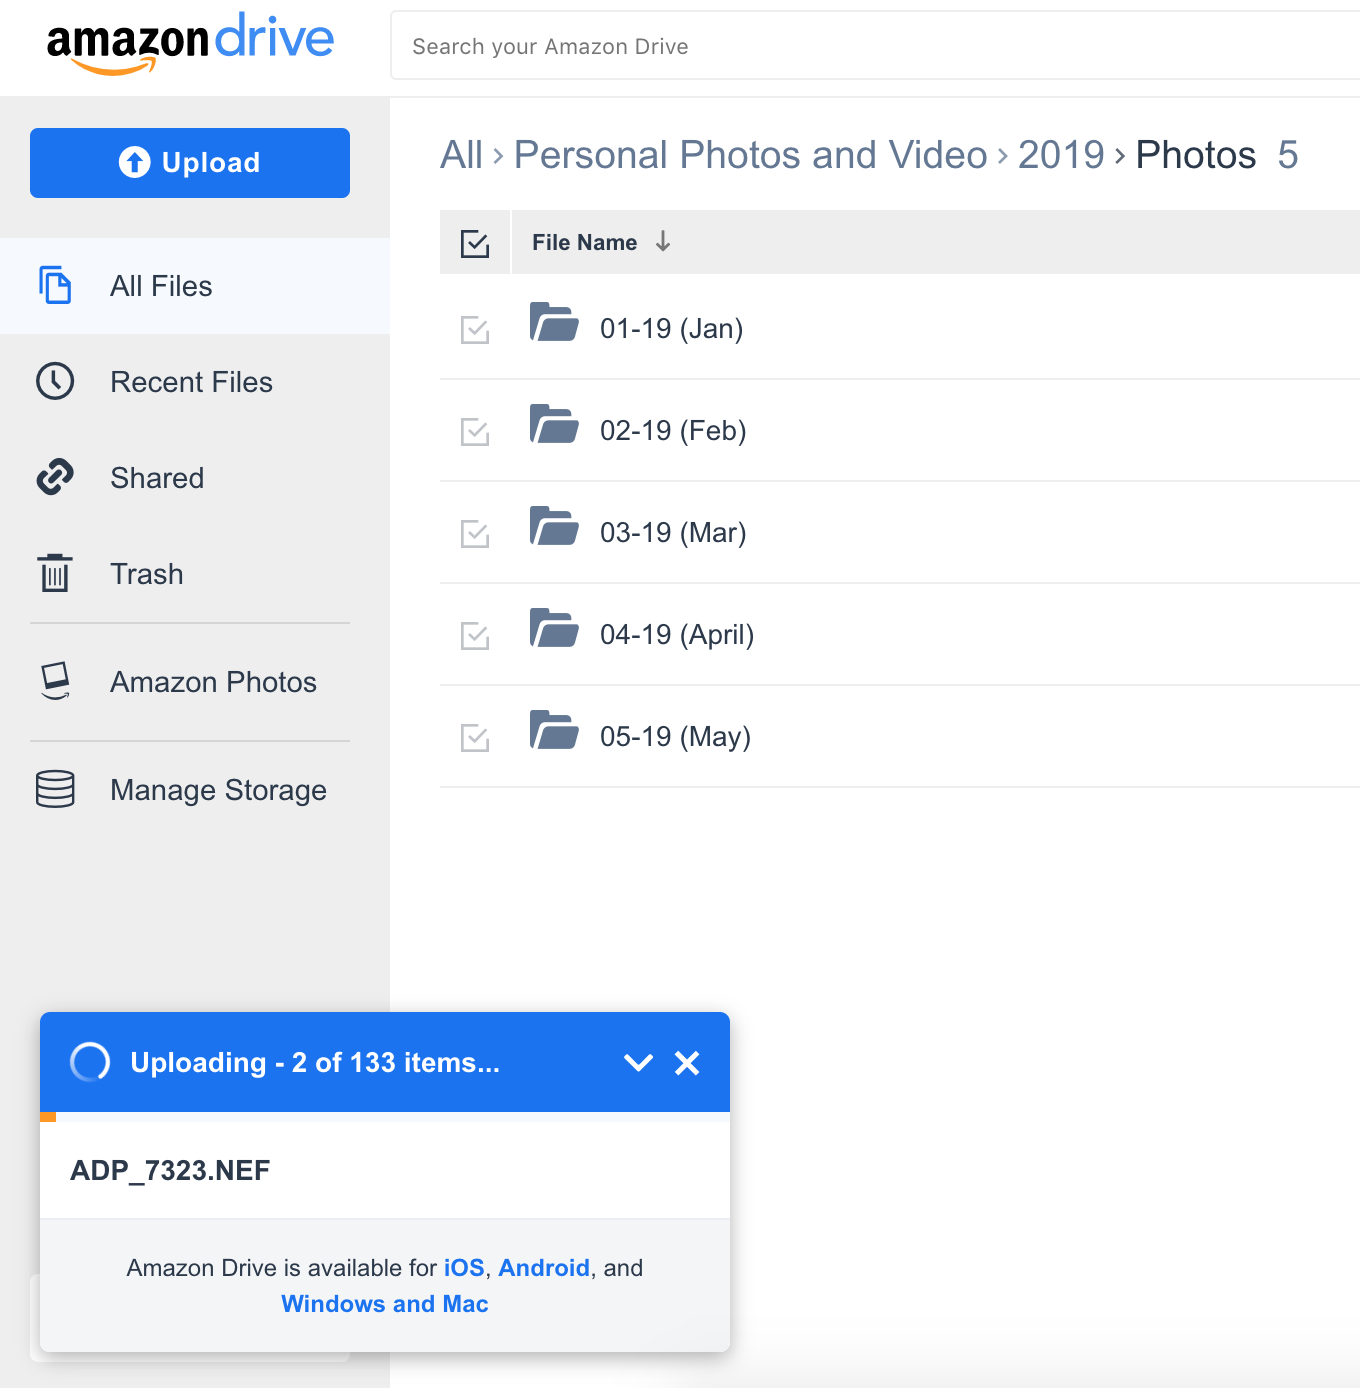
3) Phone photos are copied to Amazon Drive, deleted from Dropbox, and removed from my phone, because there are now three copies in existence: external hard drive, Amazon, and CrashPlan.

Recap:
Okay! I know that was a lot. Here’s the simple breakdown to help you remember:
1) Get photos off your devices and onto a computer. File by year, or by year > month > event / misc. > RAW / edited.
2) Allow automatic cloud backup to run for emergency long-term storage.
3) Move files from computer to external hard drive for easy-ish access long-term storage.
4) Copy files from computer to easiest-access cloud storage (Google, Amazon, etc.)
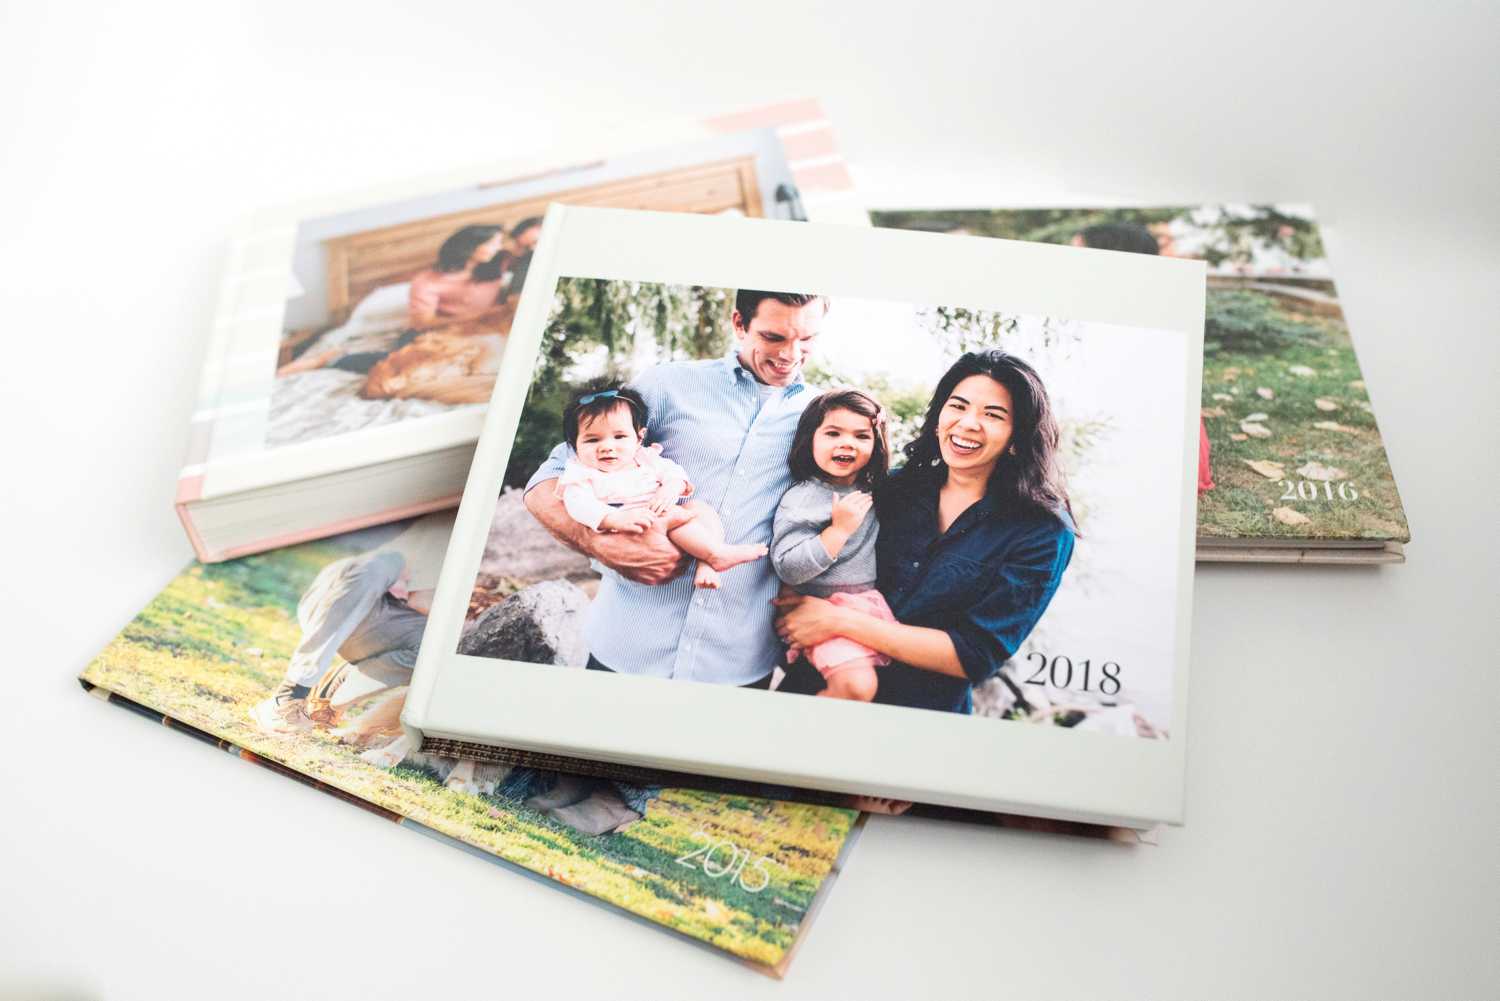
5) PRINT YOUR PHOTOS. Get ’em on your walls, put ’em in a book. I can help ;)
Q&A:
Before I started writing this post, I asked my Instagram friends if they had any questions about photo organization/storage! I covered most of them in the post, but I’ll start a little Q&A section below. Feel free to comment here or send me an e-mail or DM on Instagram, and I’ll add to this post!
Q: Where do I even start? I have so many photos in so many places.
A: Start small! That’s really the way to conquer any large project, right? Don’t try to sit down and organize all of your photos in one evening. You’ll quit. Just work backwards, a month at a time. Once you get started, you’ll feel more and more motivated to keep going! I’d recommend working backwards because photos feel like more of a treat as they get older, so you’ll get to reward yourself with old photos as you work :) Getting started may look like first buying an external hard drive to free up computer space, and opening an Amazon Drive account. Then just pull all of your June 2019 photos from all the places! At a minimum, start a 2019 folder on both your external and your cloud storage, and drop your photos into them. If you’re feeling brave or want some extra organization, do 2019 > 06-19 (June) > Major Event / Misc.
Don’t forget the magic of the Sort By: Date Created button. Lots of information is stored in photo files, and sorting by creation date will save you from having to look at every picture to determine when it was taken!
Q: I have duplicate photos everywhere! How do I clean them up?
A: I sadly don’t have a great method for eliminating duplicates because I’ve never really had to deal with this. But! If you organize your photos chronologically and get an external hard drive with a lot of space, aside from being a little annoying to look at, duplicates shouldn’t bother you too much. Organizing your photos by the creation date should batch your duplicates together, so you could go through and delete them if you want, but you could easily scroll past them to find what you’re looking for.